FDM 3D Printer
I have been using rapid prototyping machines since the beginning of my career always wanted one for myself, but their cost was prohibitive. When the main patent covering FDM printing expired and the Reprap movement made 3d printing approachable, I decided to design and build my own. In 2015 I made version 1. Since then I had several commercial machines, but kept improving my own design and experimenting with new ideas. Though this is a hobby project I gained a lot of experience and knowledge around motors, motion control and programming on the Arduino platform. All this was directly transferable to my actual work and since 2016 all of my roles were related to robotics or had a lot of mechanisms and motion.
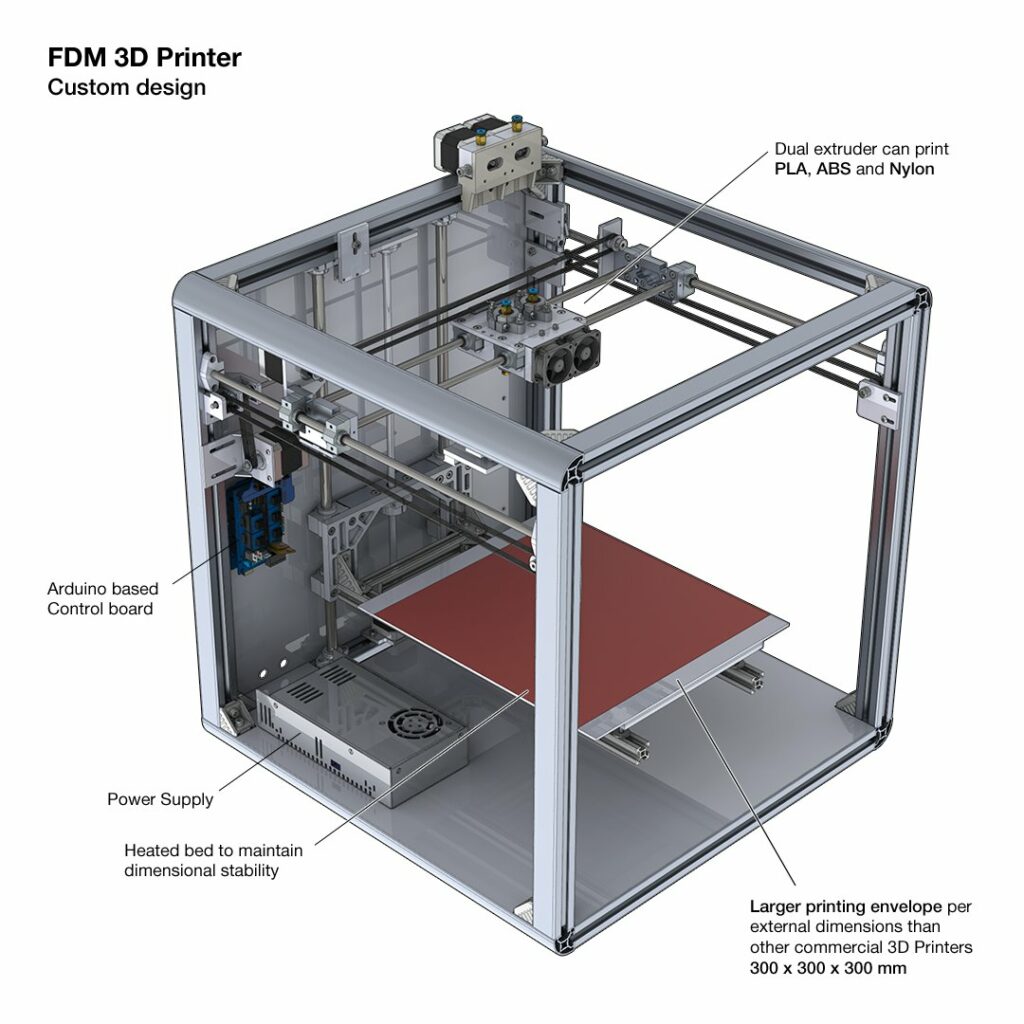
Ver. 1
The main feature of the machine was the large build volume, 300x300x300mm, which was larger than the available consumer machines of the time such as Makebot, Ultimaker etc. Also unlike other machines which used 3d printed parts this machine was fully aluminium. All parts other than the standard extrusions were water jet cut to keep the cost low.
The kinematics were traditional cartesian. The electronics and firmware were an Arduino Mega 2560 R3 with Ramps 1.4 shield running Marlin. There was an additional Raspberry PI running a print-server app.
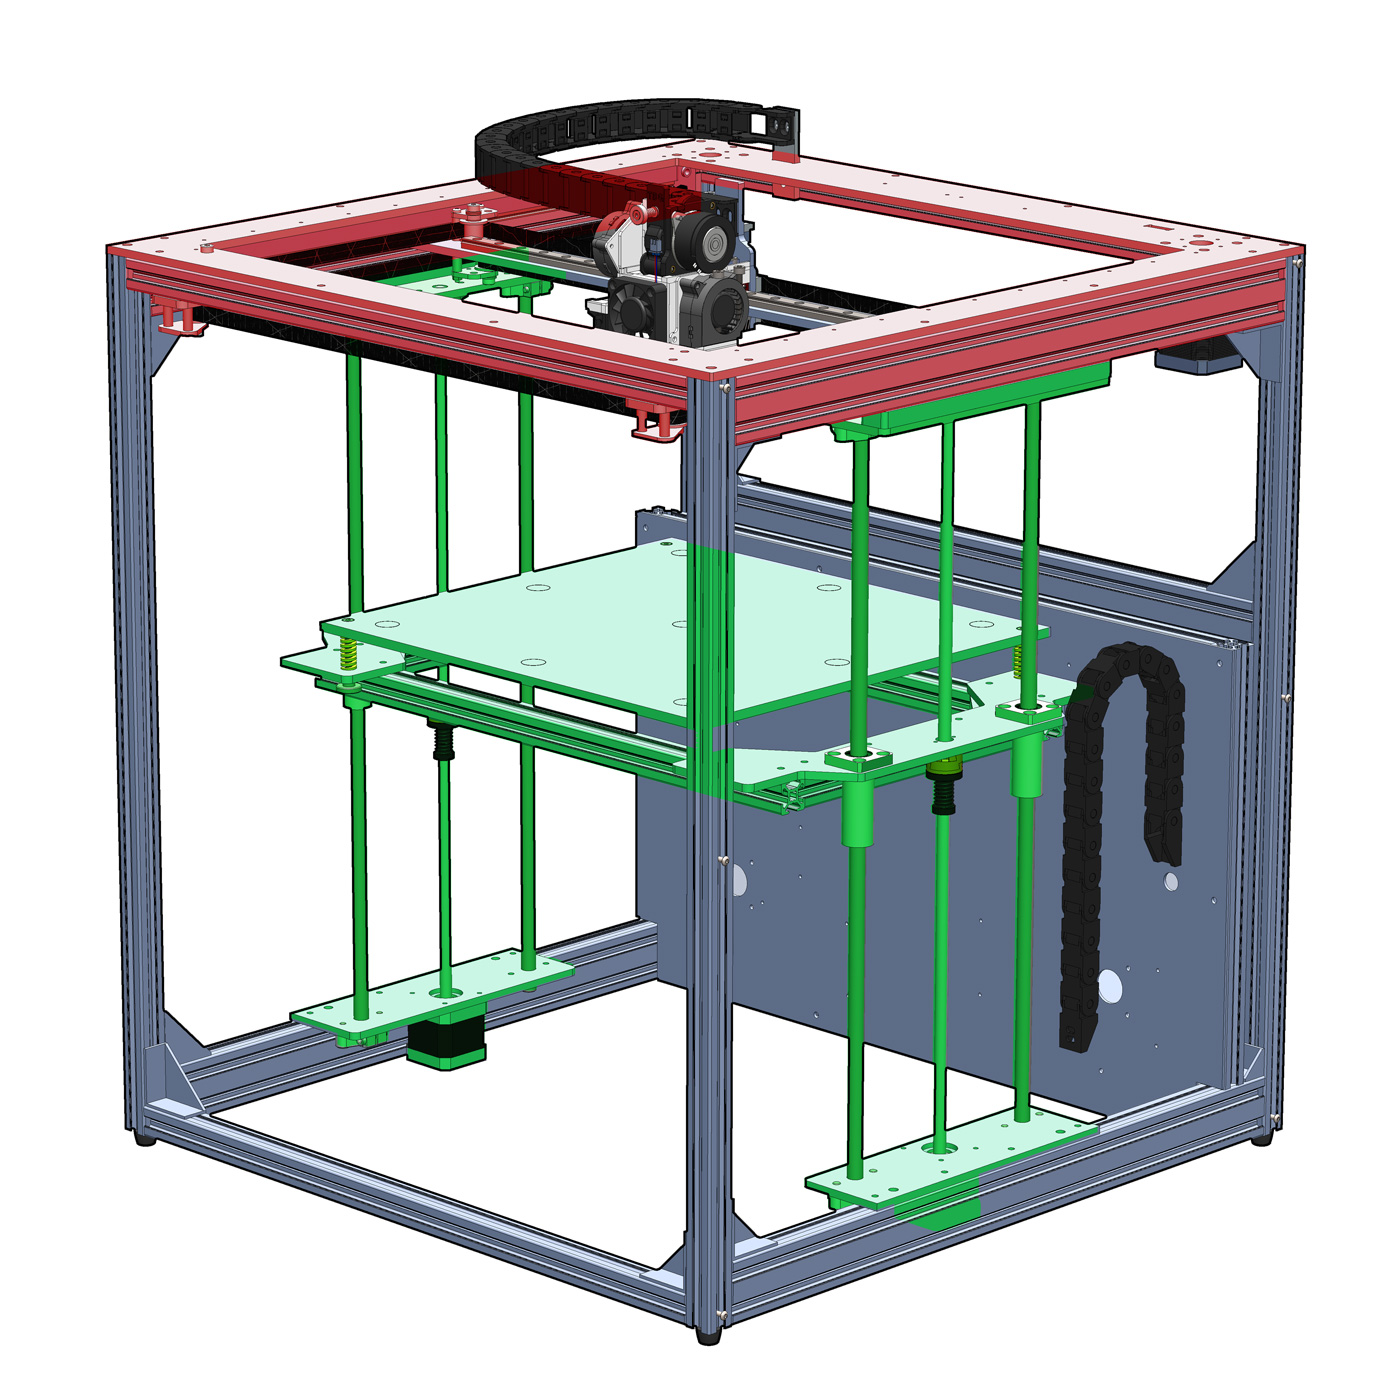
Ver. 4
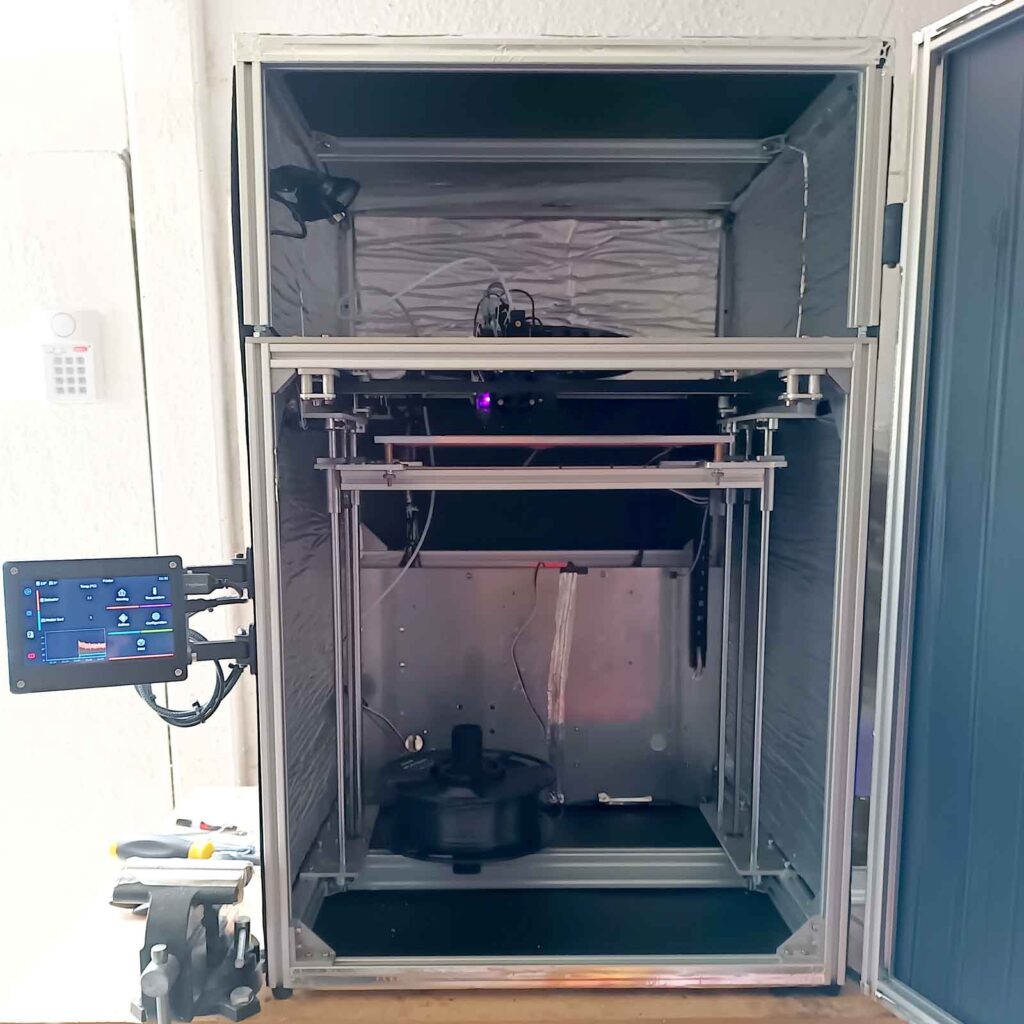
The machine was redesigned completely and currently using corexy kinematics that allow for faster prints. It can print reliably up to 150 mm/s speed and 15,000 mm/s^2 acceleration which is a lot faster than most consumer printers.
To archive that, the motors and Y axis linear rails are all mounted on a water jet cut thick aluminium sheet. There are 20x40mm aluminium extrusions around it and under them additional brackets so that pulleys and motors are not cantilever. Essentially all the motion components are contained it this 40mm high sandwich of aluminium creating a very rigid structure that can cope with the vibrations induced when moving the printhead at this speed and acceleration
The build volume is now 310x310x450mm and there is a much more stable print bed mount on 2 sides. This is also mounted directly on the motion “sandwich” to reduce the stack of tolerances. There are anti-backlash leadscrew nuts on Oldham couplings again to improve precision and eliminate issues from miss aligned or vibrating leadscrews
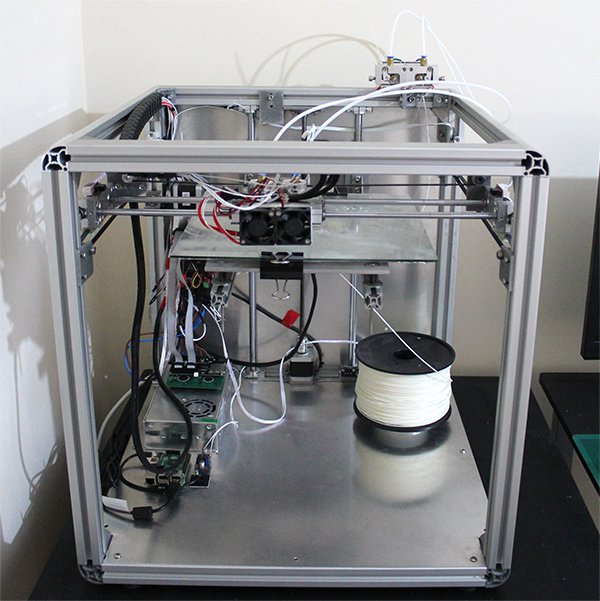
The good cable management and compact size allowed me to add an insulated enclosure. Last but not least the hot end can extrude a variety of materials up to 400C.
The printer is running on Klipper firmware installed on a Raspberry PI. It supports remote printing via a web UI, monitoring through a webcam and various elements including power to the entire machine can be switched on/off via Wi-Fi.
Comparison
| VERSION 1 | VERSION 4 | |
|---|---|---|
| Printing volume | 300 x 300 x 300 mm | 310 x 310 x 450 mm |
| Kinematics | Cartesian | Core XY |
| Speed (max reliable) | 70 mm/s | 150 mm/s |
| Acceleration (max reliable) | 5,000 mm/s^2 | 15,000 mm/s^2 |
| Hot end | 250C dual setup | 400C single |
| Print bead | Cantilever design Glass Silicone heater 220V powered via SSR relay | Supported on 2 sides dual motors PEI coated magnetic sheet on high temperature samarium cobalt magnets Silicone heater 220V powered via SSR relay |
| Frame | 30x30mm aluminium extrusions all metal parts | 20x20mm extrusions Passively heated enclosure up to 70C |
| Firmware and Electronics | Arduino Mega 2560 R3 and Ramps 1.4 shield with drv8825 stepper motor drivers Marlin 1.X firmware Raspberry Pi with Octoprint | STM32 controller with TMC2209 stepper drivers Raspberry Pi with Klipper firmware, web UI, touchscreen and web camera 2 Power supplies for 24V and 5V, relay board isolating bed heater, 24V PSU, enclosure lights. |
First print of my cartesian printer using ABS
Corexy printer printing a test benchy
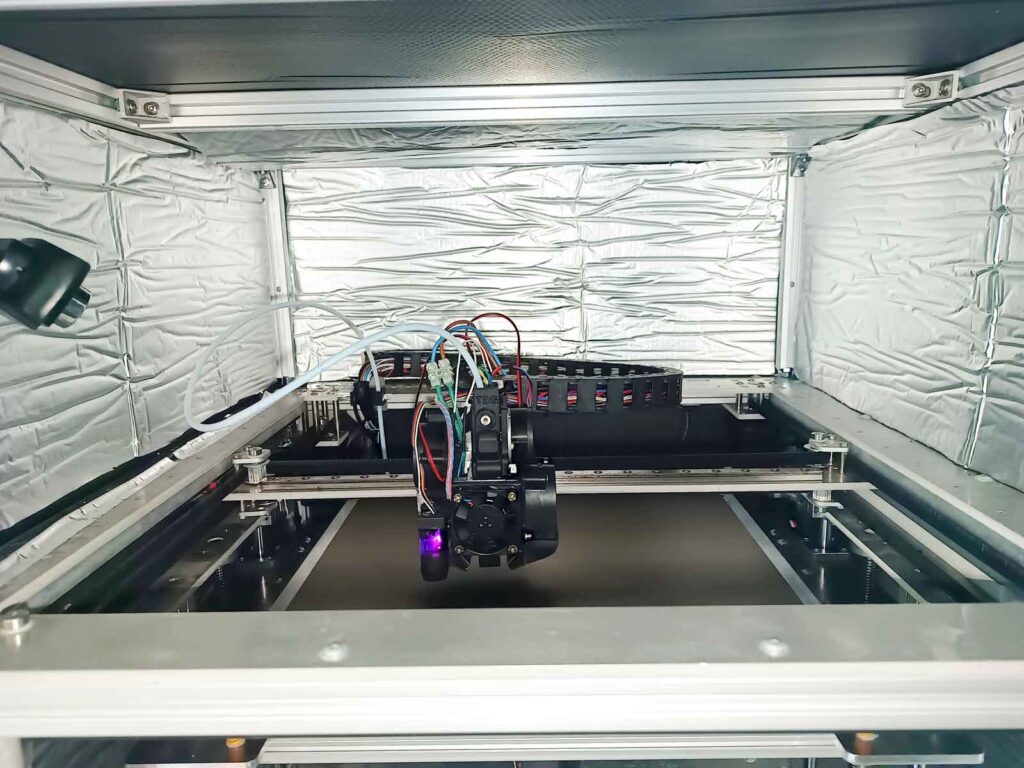
Photo of X axis and print head